Working with Project Labels
With Project Labels, we aim to make using labels on your Jira Cloud instance much easier. At the core of this is a new field that you can add to your issue screens; Project Labels. A project label behaves almost like a normal label field, with two major exceptions:
- Users can only use previously defined labels
- Project admins pre-define these labels on a per-project basis
Defining a Project Label
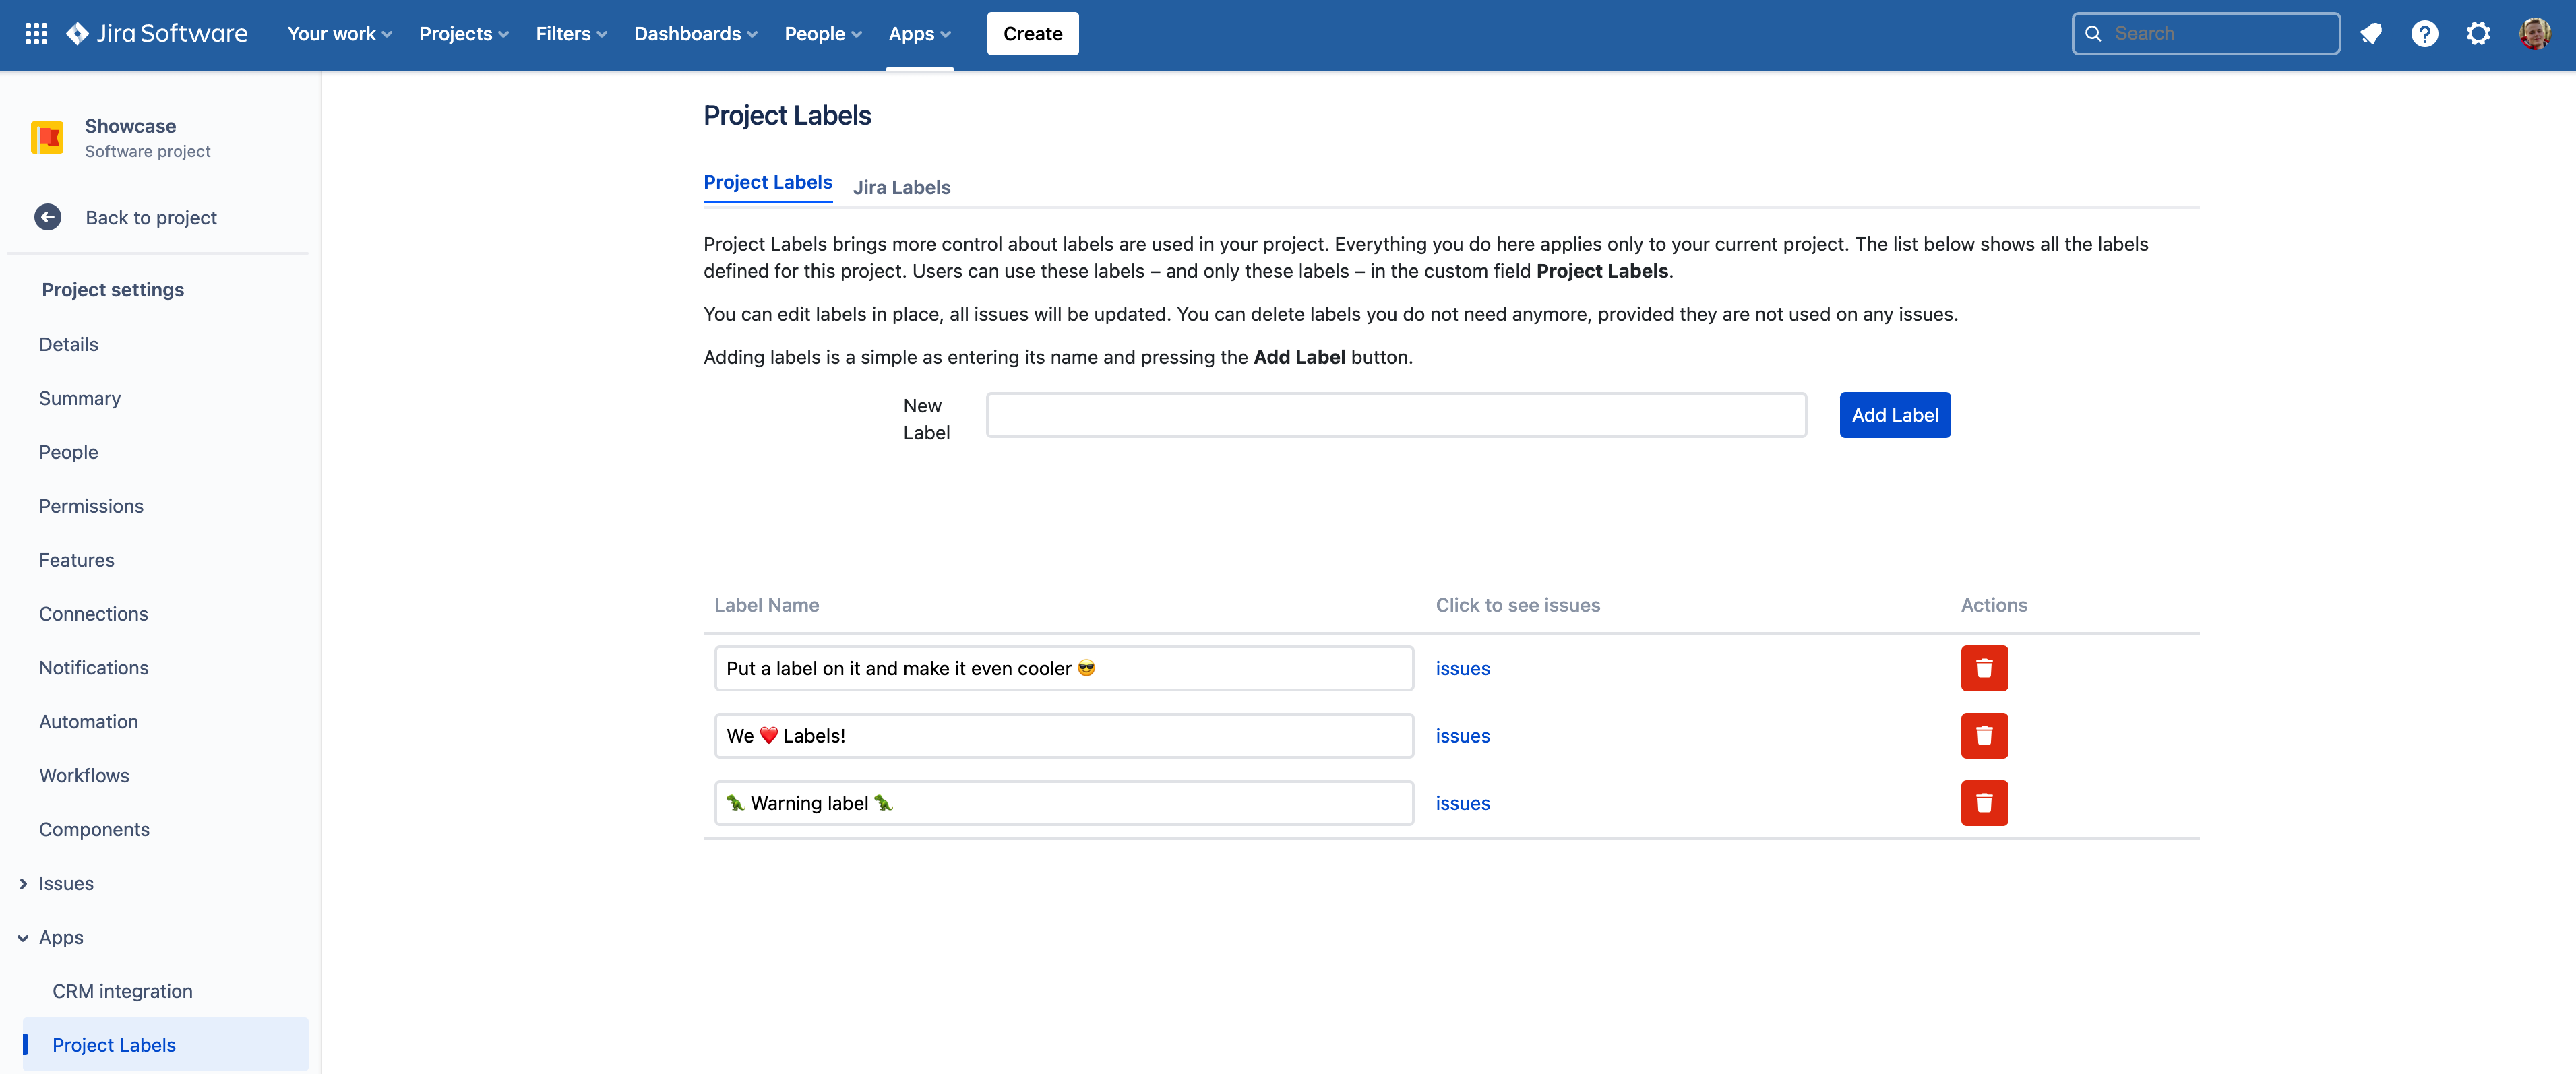
Working with Project Labels is done from the Project Settings. Once the App has been installed, you’ll find the App in the Project Settings under the section “Apps” at the bottom of the sidebar. You should see something like this:

This is where you can add Project Labels to your project. Simply enter the label name into the “New Label“ input box and click the Add Label button. After a couple of seconds your new label will appear in the list.
Updating a Project Label
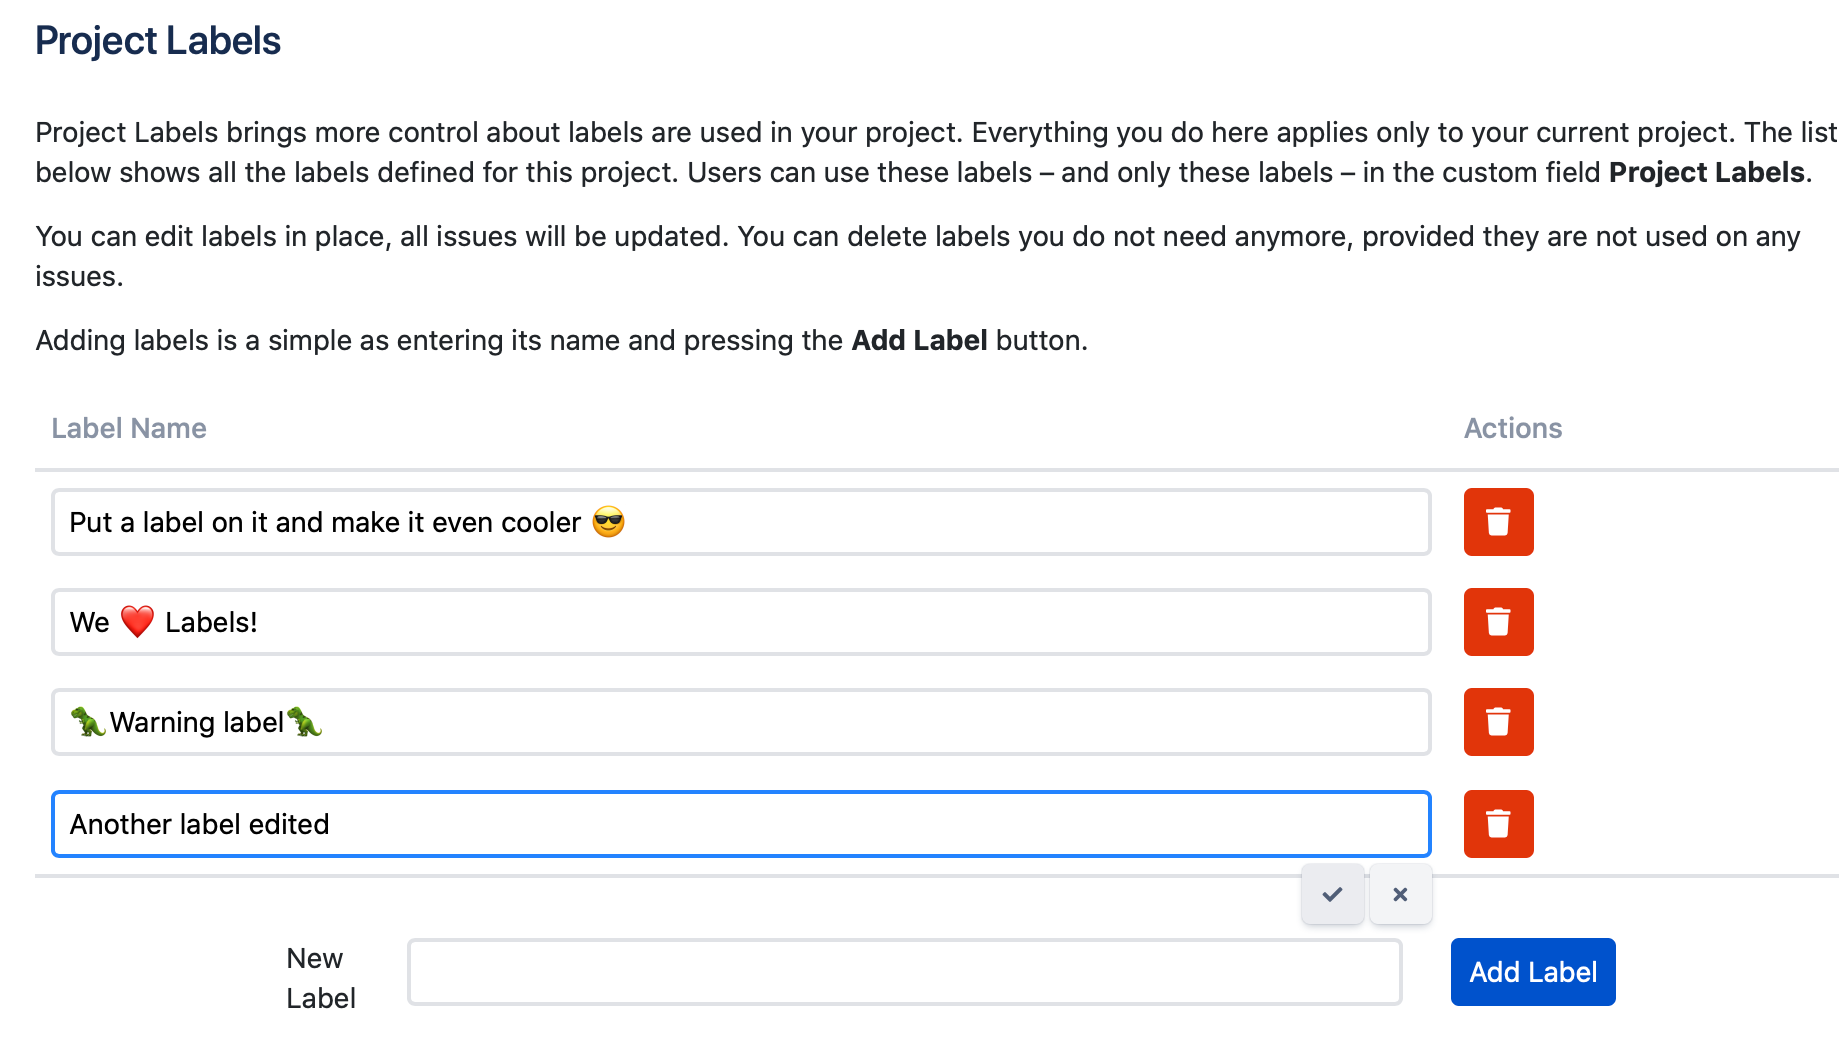
Working with Project Labels is done from the Project Settings. Once the app has been installed, a new menu item called Project Labels will appear. Click on it to get to the Project Labels app. Updates can be done in place; just click on the label you want to edit, make a change and then click on the checkmark to the right of the input box.

Deleting a Project Label
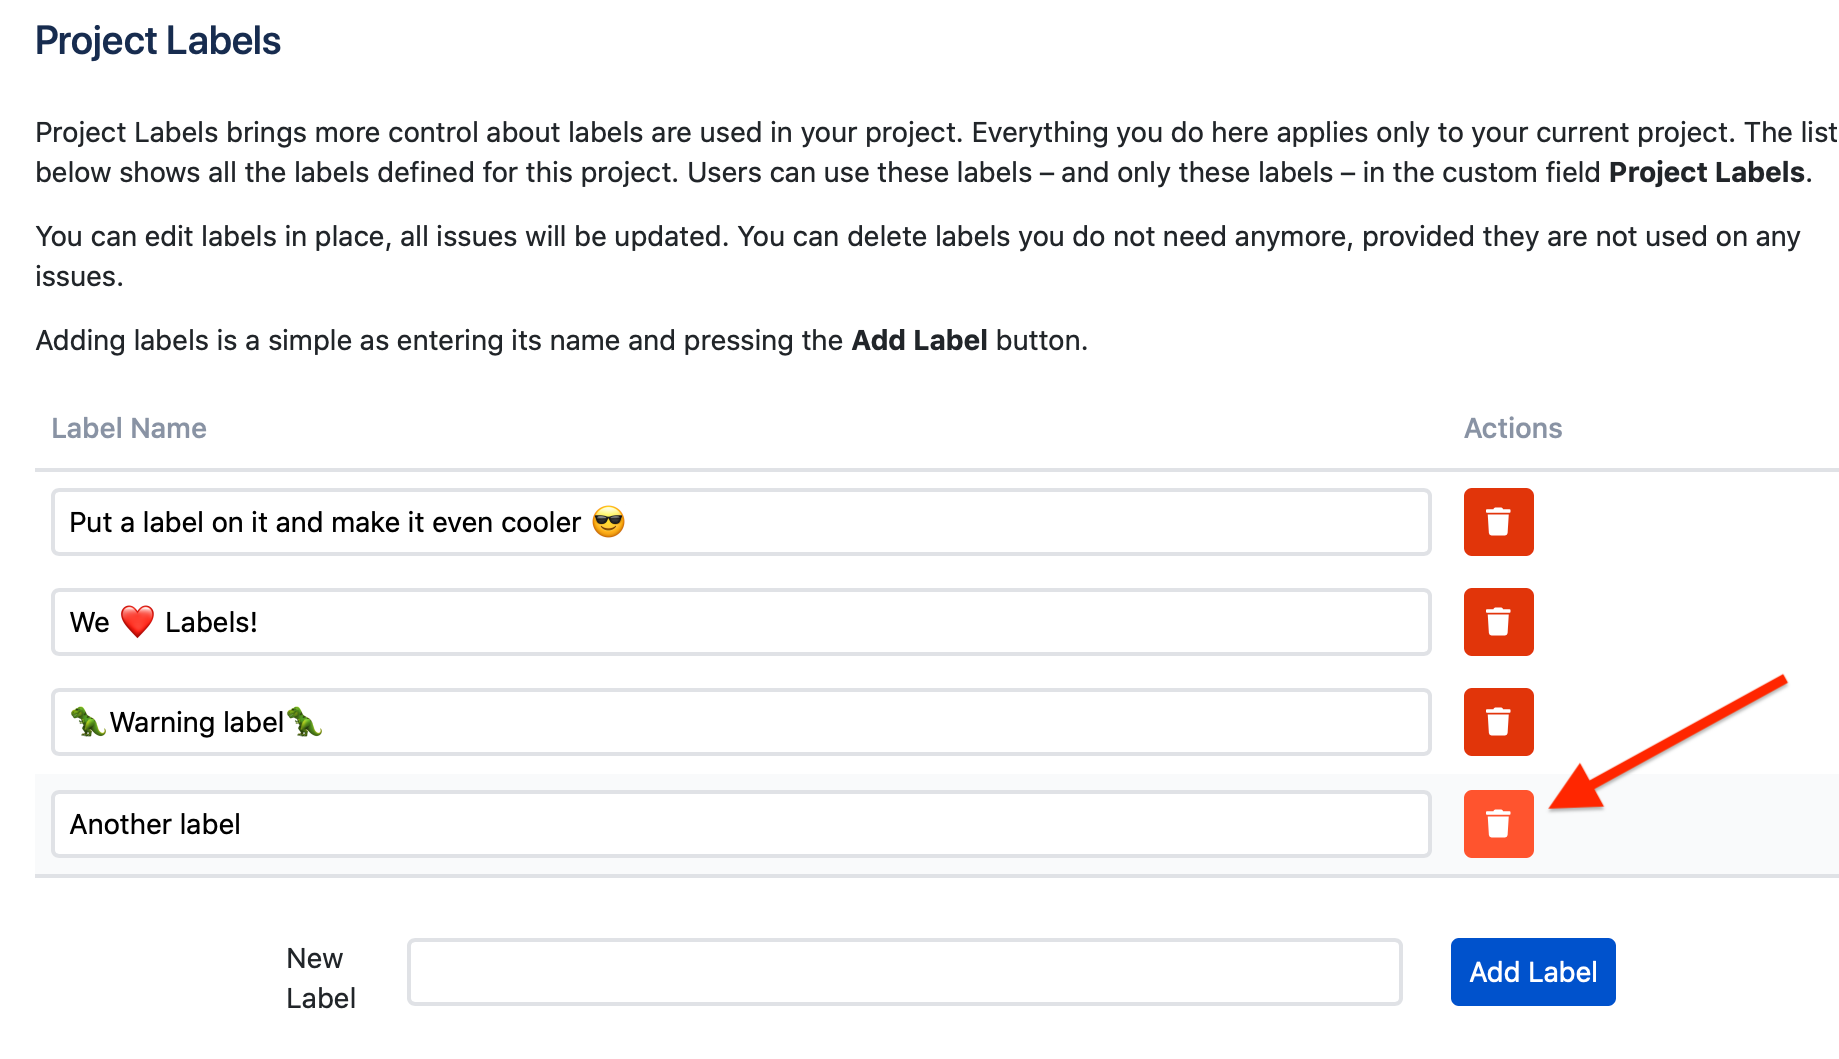
Working with Project Labels is done from the Project Settings. Once the app has been installed, a new menu item called Project Labels will appear. Click on it to get to the Project Labels app. Deleting a label is just as easy as you would expect. Simply click the trashcan icon next to the label you want to delete:

You can only delete a label that is not in use. If you try to delete a label that is in use, you will get an error message.
Adding a Project Label to your Screens
Your Project Label is a field like any other in Jira, so you will need to add it to your issue screens in order to see it.
Searching for Project Labels
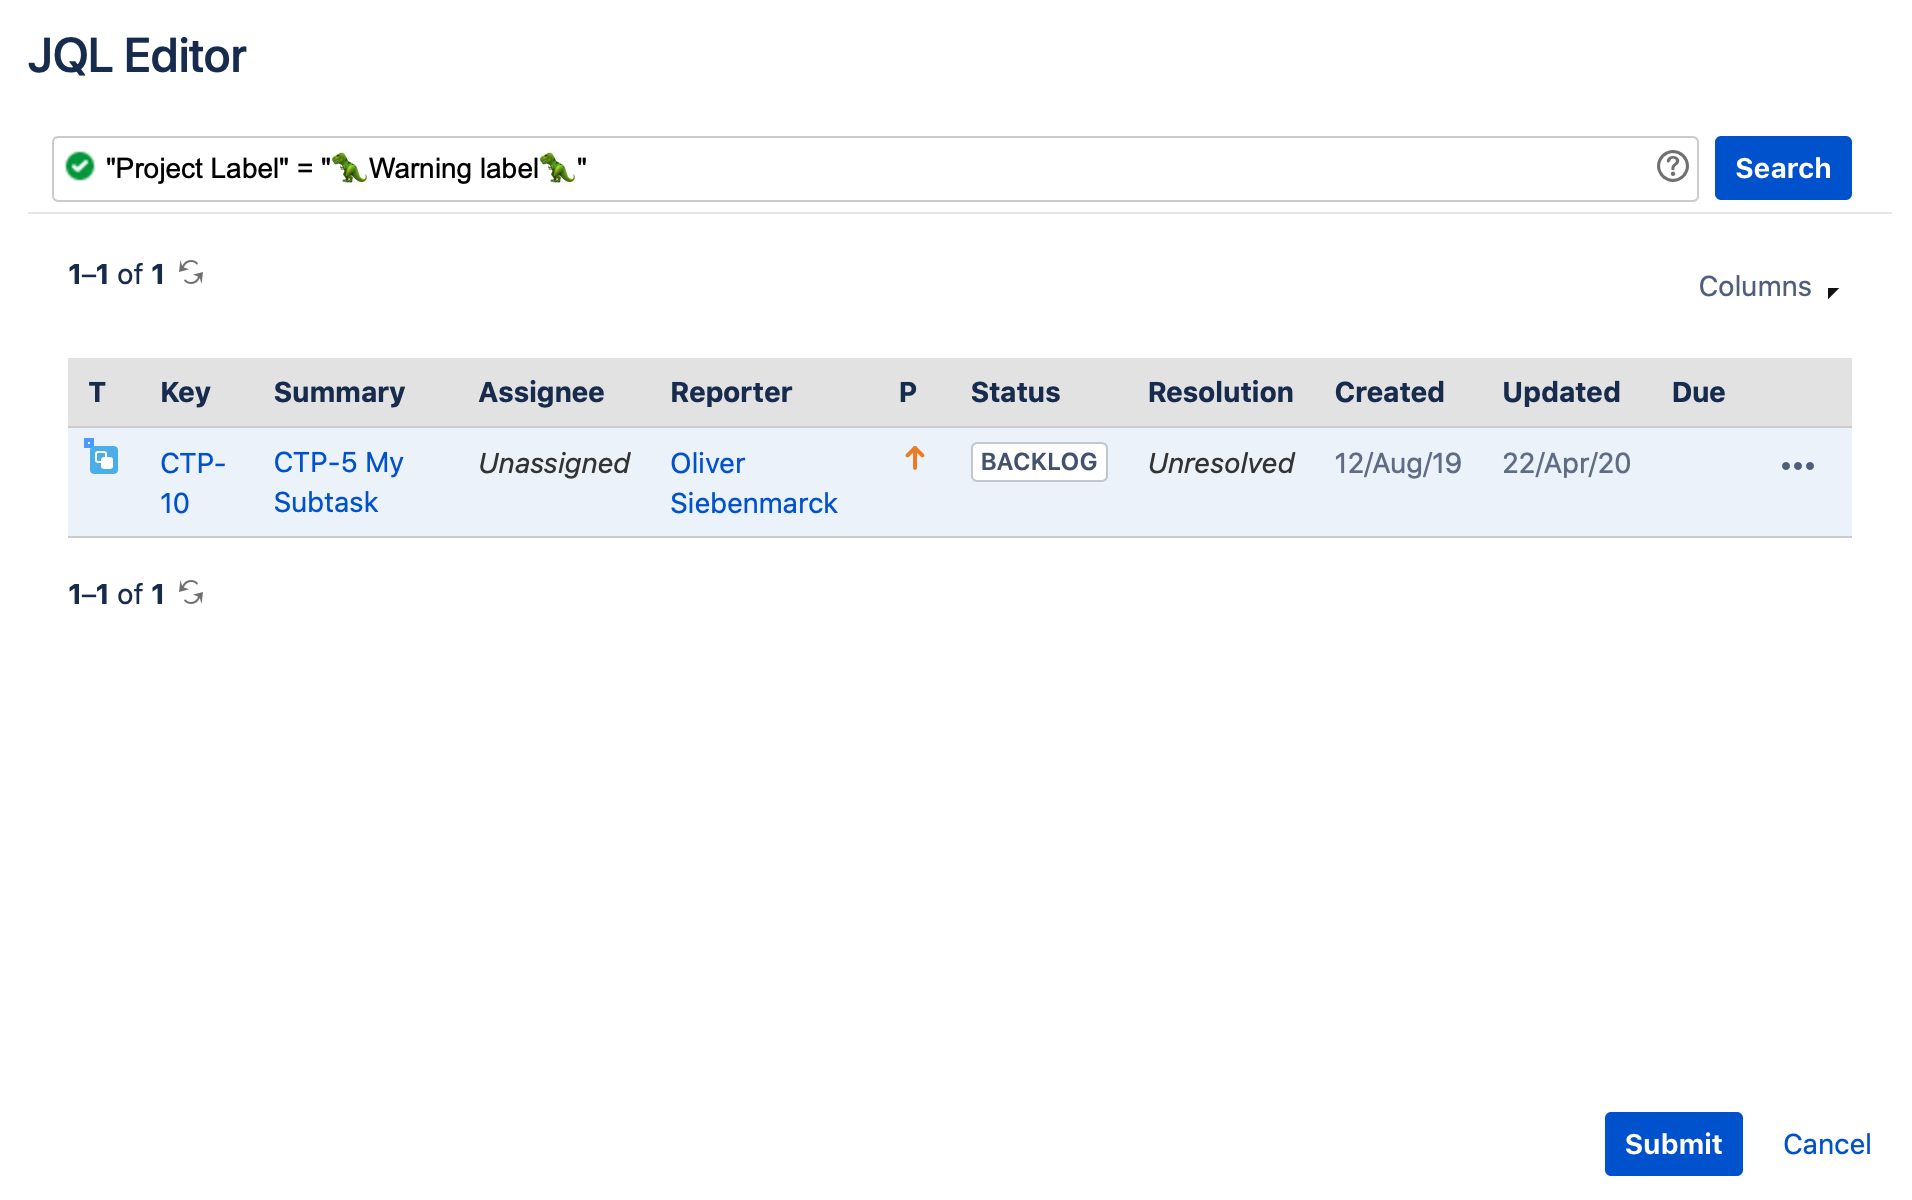
Since Project Labels behave just like any other field in Jira, you can use them in JQL queries and filters. Just like this:
