Working with Automations
Automations Overview
Enhance your workflow by implementing automations for your Project Labels. Automations streamline and simplify repetitive tasks and processes, allowing you to create triggers that automate various actions, reducing manual effort and improving productivity. You can set up rules to automatically perform tasks such as assigning issues, sending notifications, updating statuses, and more.
How to set it up
Step 1: Select Trigger
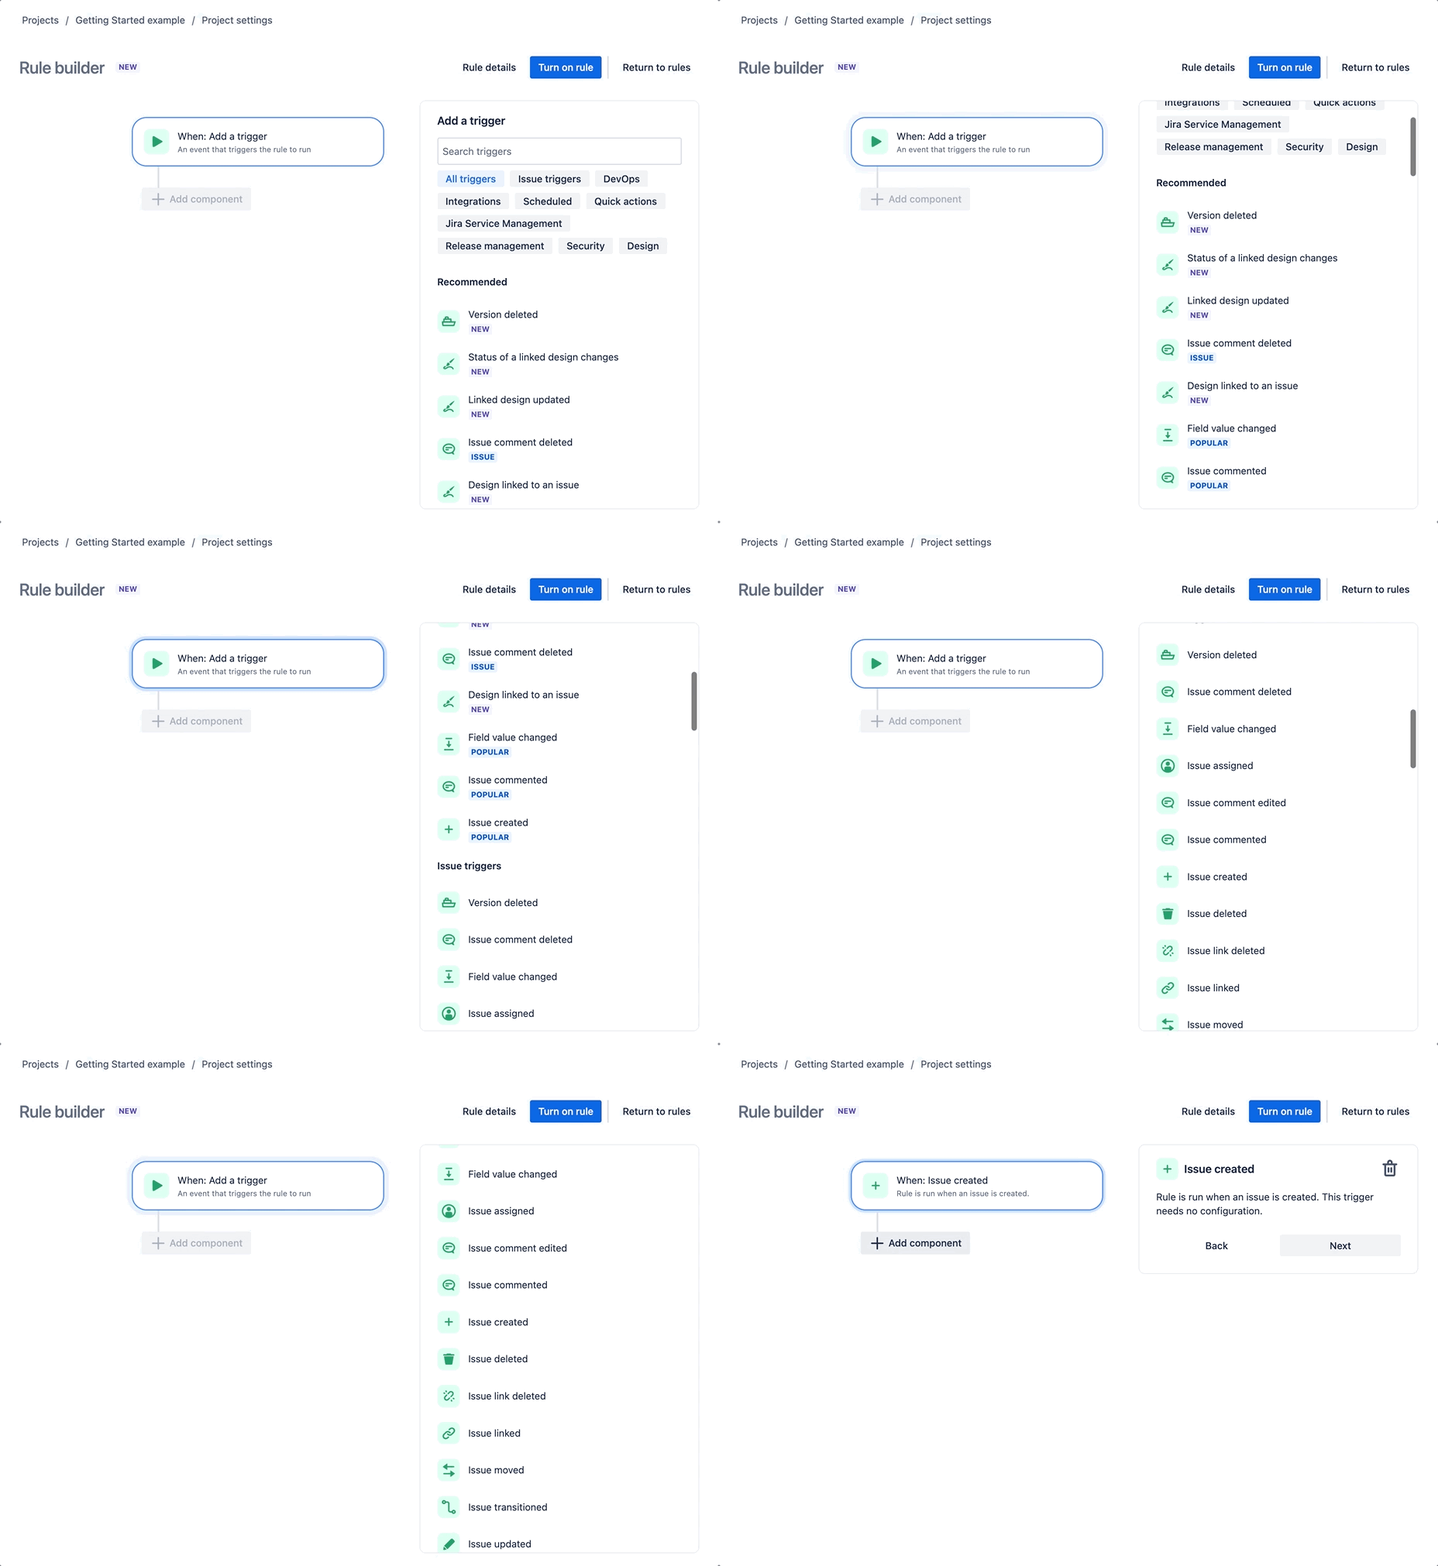
You will find the automation settings for your project in the Project settings section of your app. Once there, click on 'Automation' in the left-side panel and select the button 'Create rule'. The following page will appear, and here you can choose which trigger you would like your automation to occur on:
Step 2: Add a component
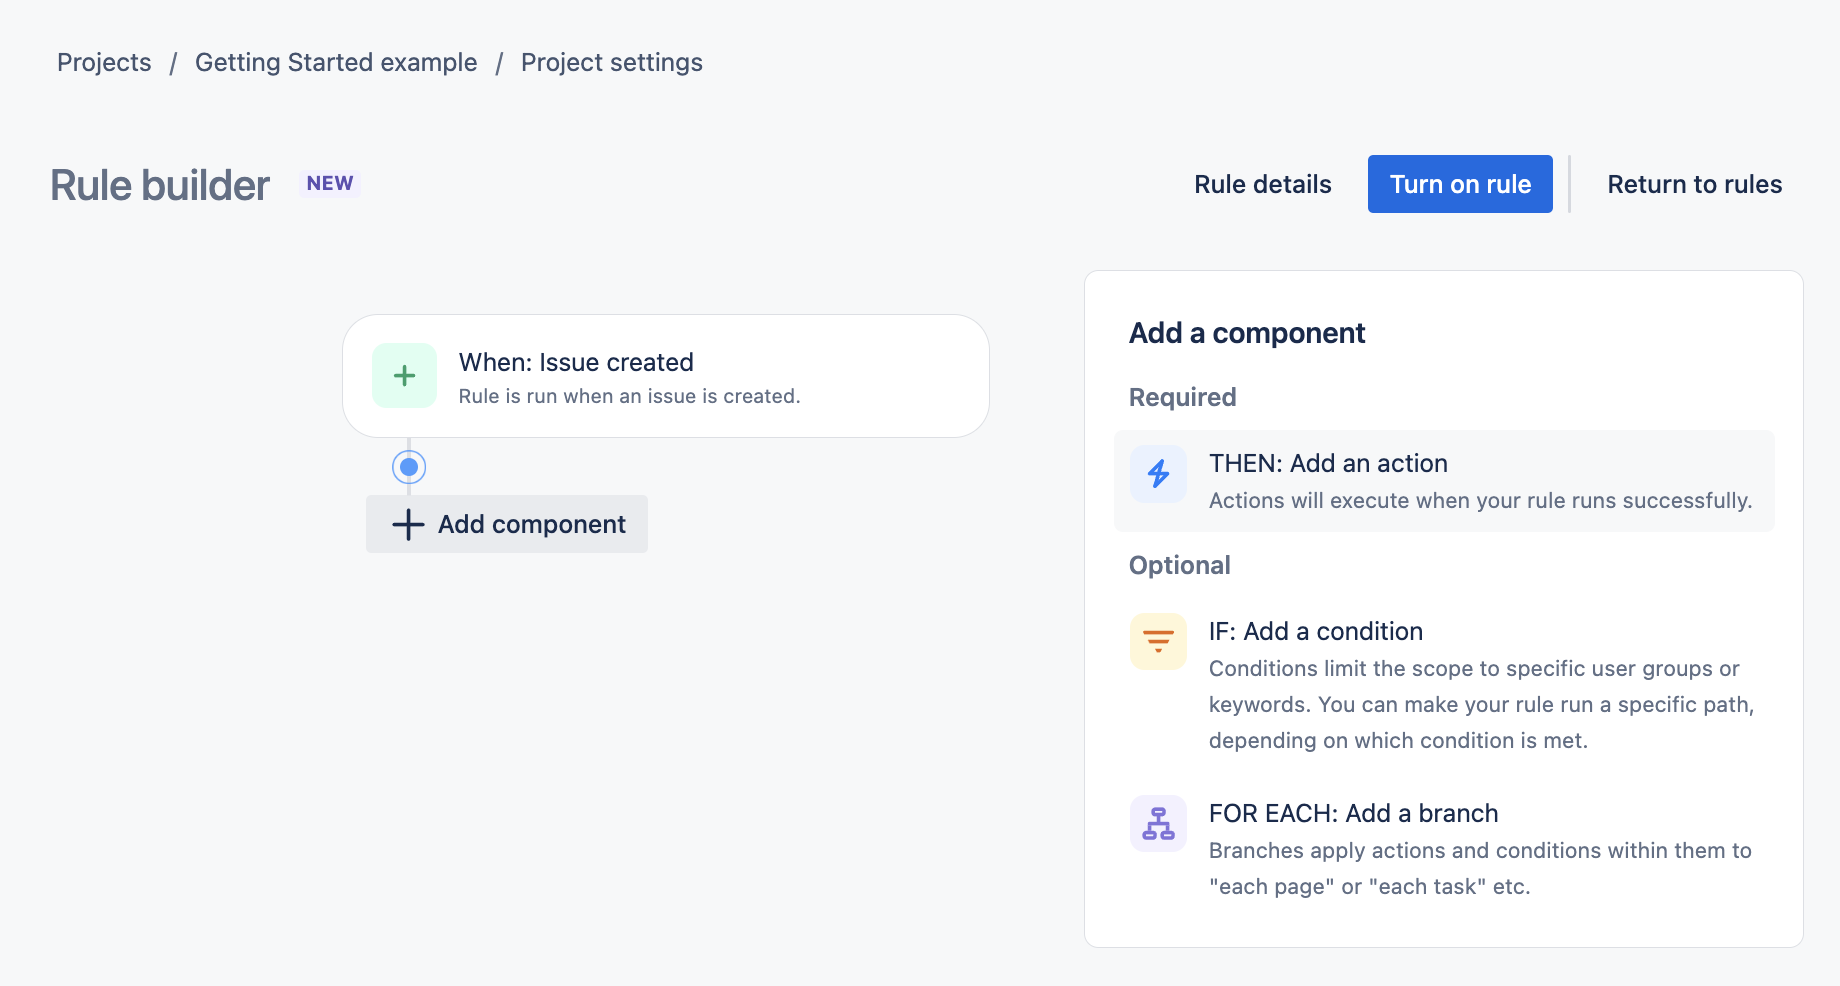
You then add a component to this trigger. To do this, select 'THEN: Add an action'. You can optionally add an IF statement or a FOR EACH, but for this example, we will just be focusing on THEN.
Step 3: Add an action
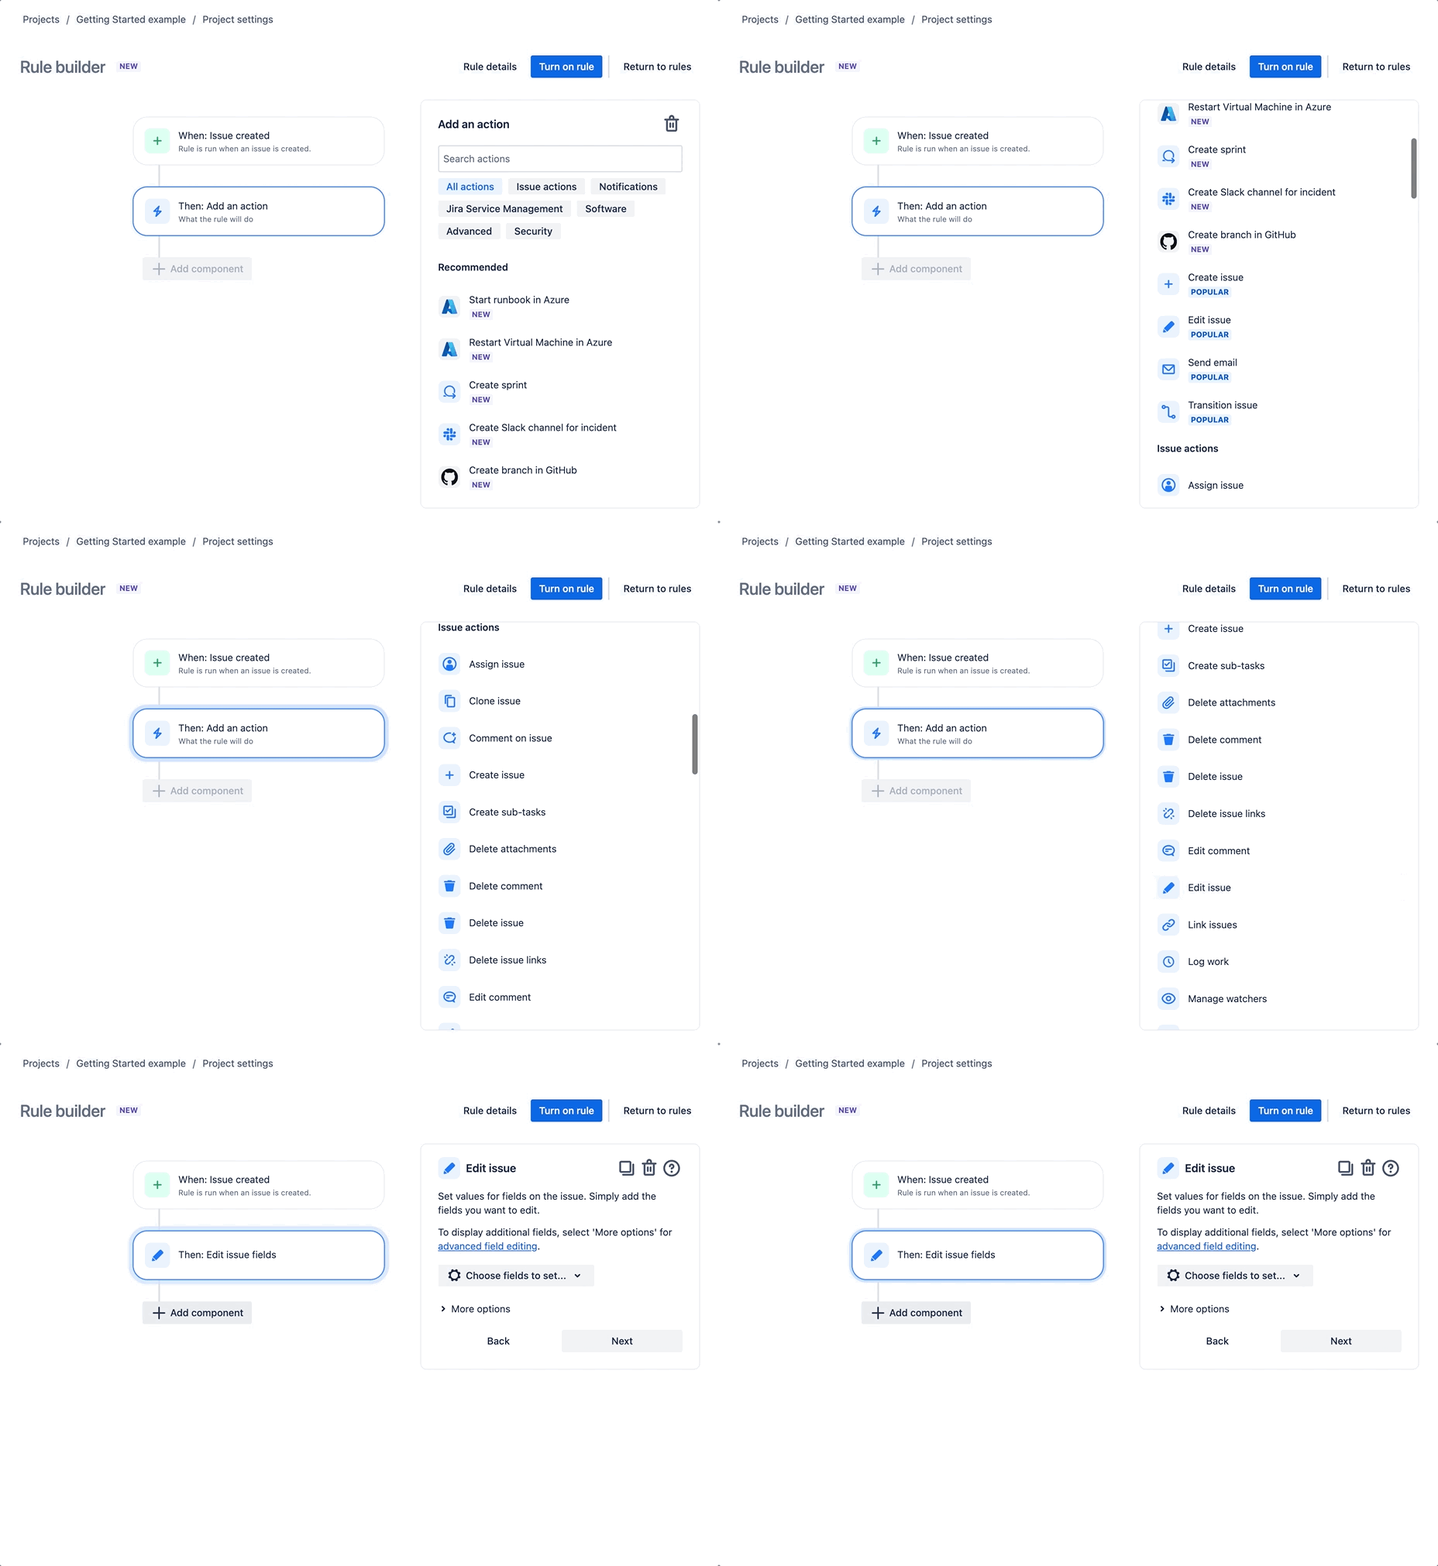
You can then choose from a variety of actions for what you want to happen when your issue is created. We will be choosing 'Edit issue' for this example, as this action demonstrates what you can do with Project Labels:
Step 4: Add JSON object
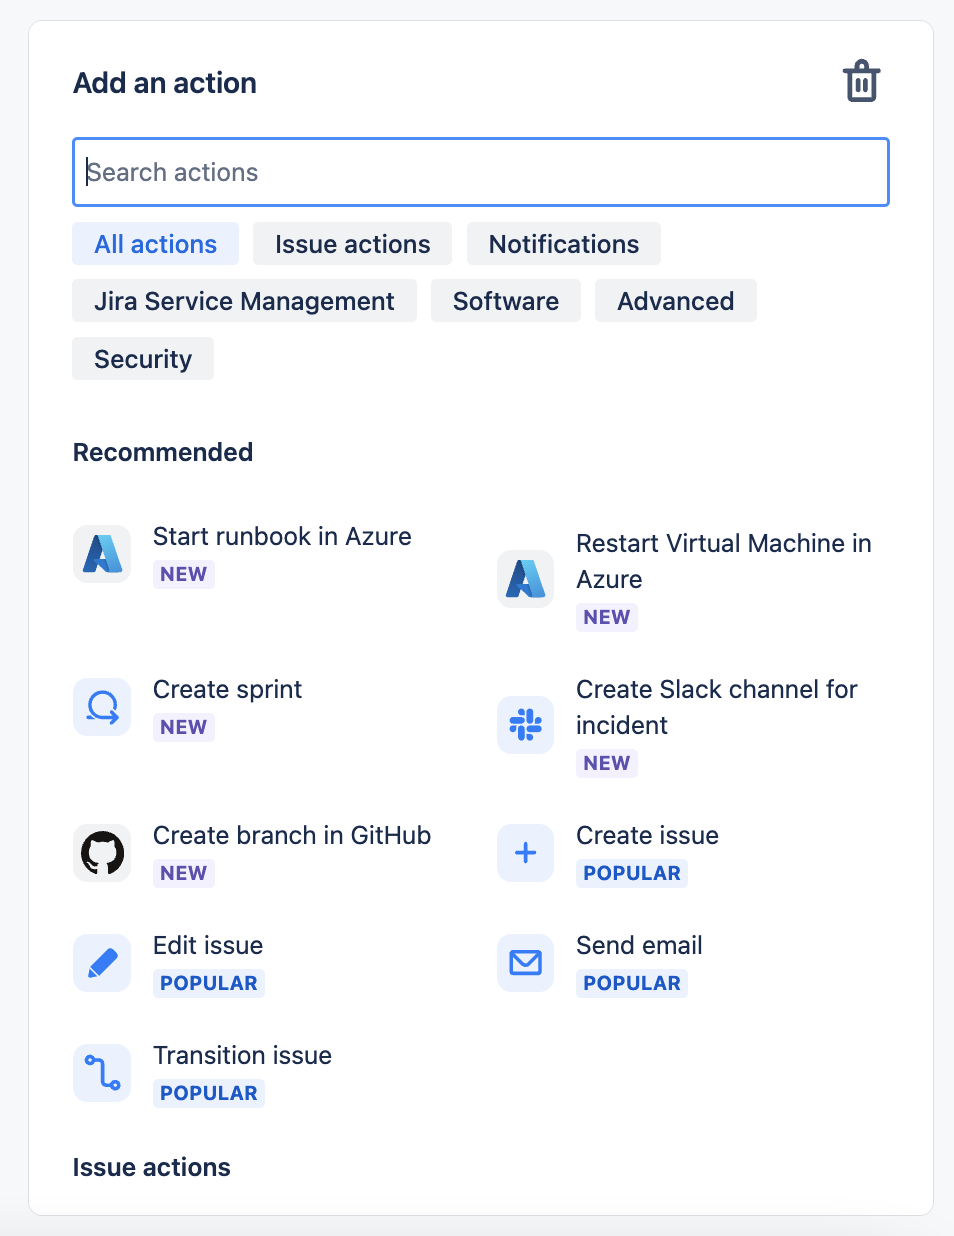
This field allows you to set values for fields when you create an issue. Since Project Labels are not an Atlassian field, you will need to add them as a JSON object, which you can do by selecting 'More options' and placing your JSON object in the Additional fields textarea:
Understanding JSON objects
Atlassian's documentation on this is not entirely accurate, which has led to a few issues for our users in the past. It is important to understand that Automations use Jira’s REST API under the hood, so many of the ways you format data there will be the same here. The following example shows you how to update an issue according to the user's custom field. All you need is the name of the custom field and the ID:
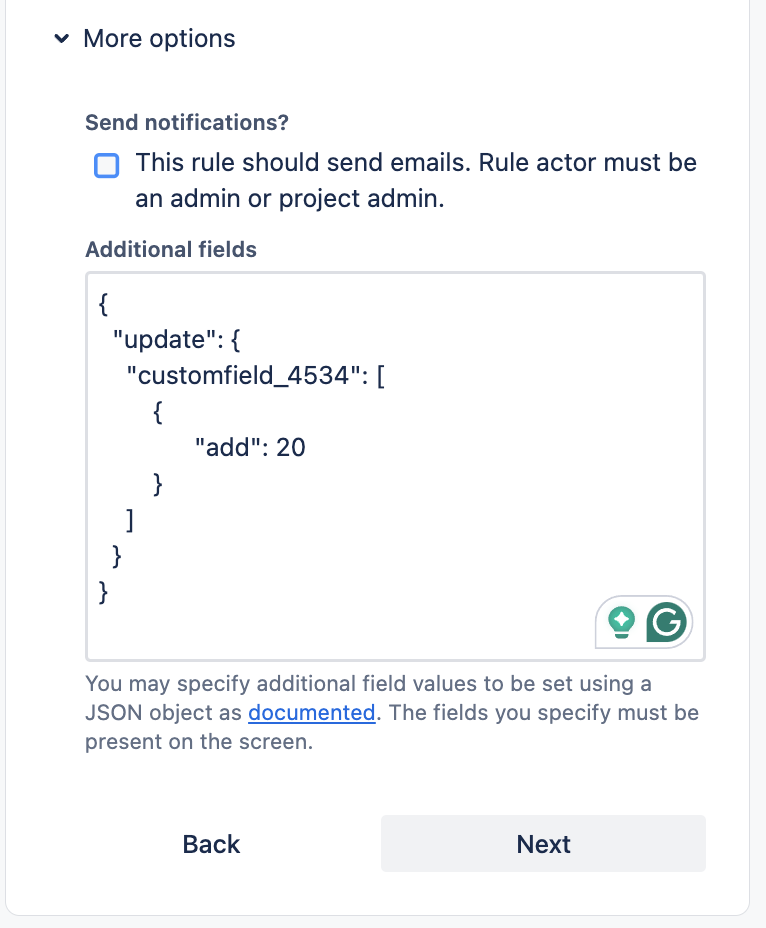
In the above code, 20 is the ID. As you can see, the ID is simply entered as a number in the 'add' field of your custom field. At the moment, this is the only use case that we know does not work according to how Atlassian documents it. If you have a different use case that you cannot get to work, feel free to send us a message, and we can look into it!