Working with Jira Labels
With Project Labels, we aim to make using labels on your Jira Cloud instance much easier by giving every team member a place to manage the labels used in their project.
Working with the Project Labels app is done from the directly from your project. Once the app has been installed, a new menu item called Label Manager will appear in every project. Click on it to get to the Label Manager.
Checking Label Use in Your Project
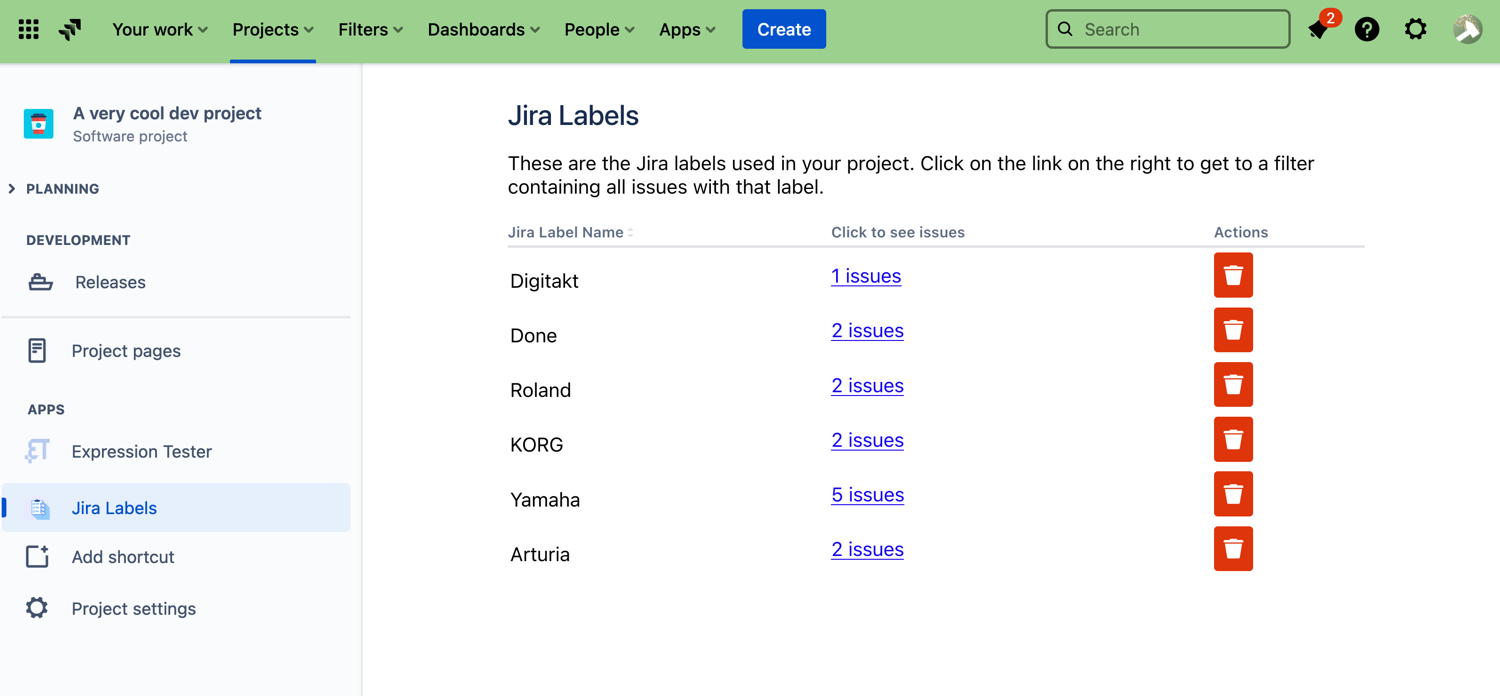
Go to your project and open the Label Manager from the sidebar. You should see something like this:

This is a list of all the Jira labels used in your project. The second column shows you how many times a label has been used. Clicking on that link opens a new tab with a filter that shows all issues with that label in your project.
Renaming a Jira Label
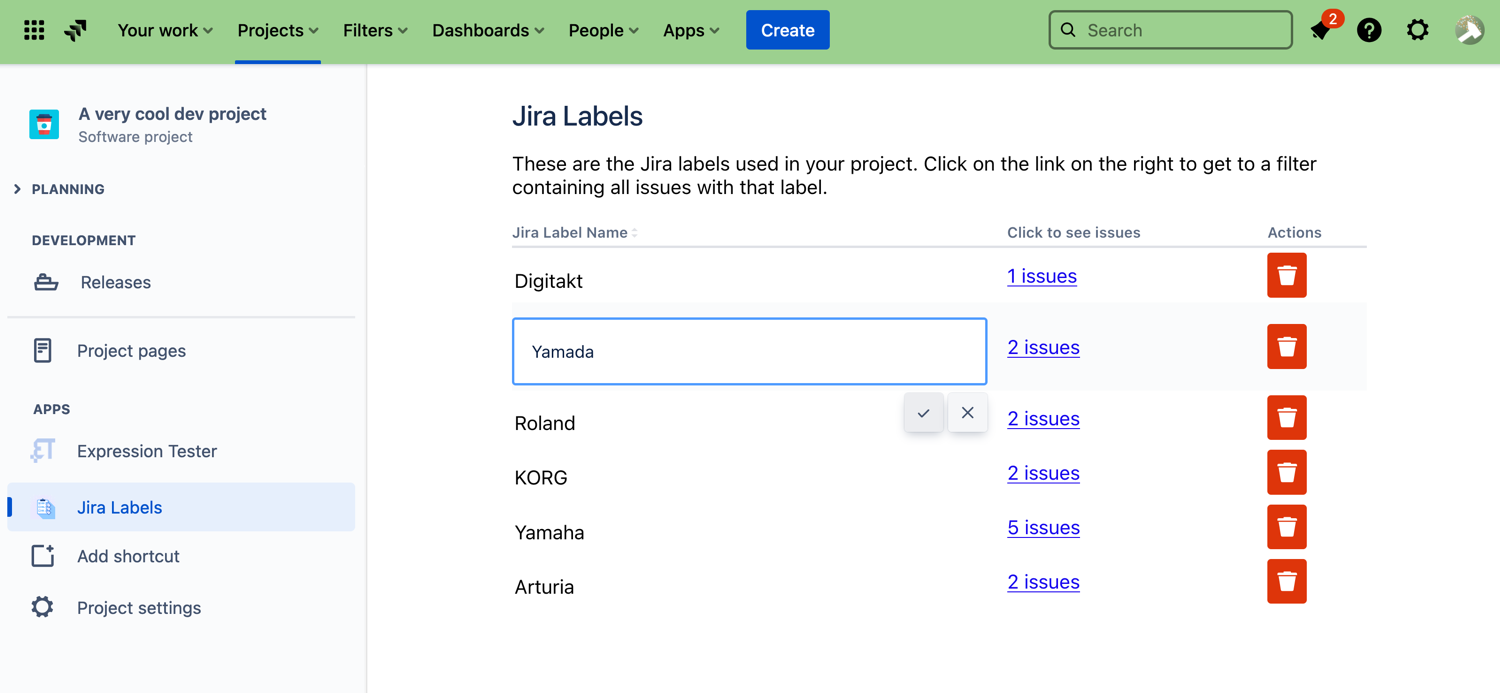
Renaming a label is done in place; just click on the label you want to rename, make a change and then click on the checkmark to the right of the input box. All issues with that label will be updated to use the new label name.

Merging Jira Labels
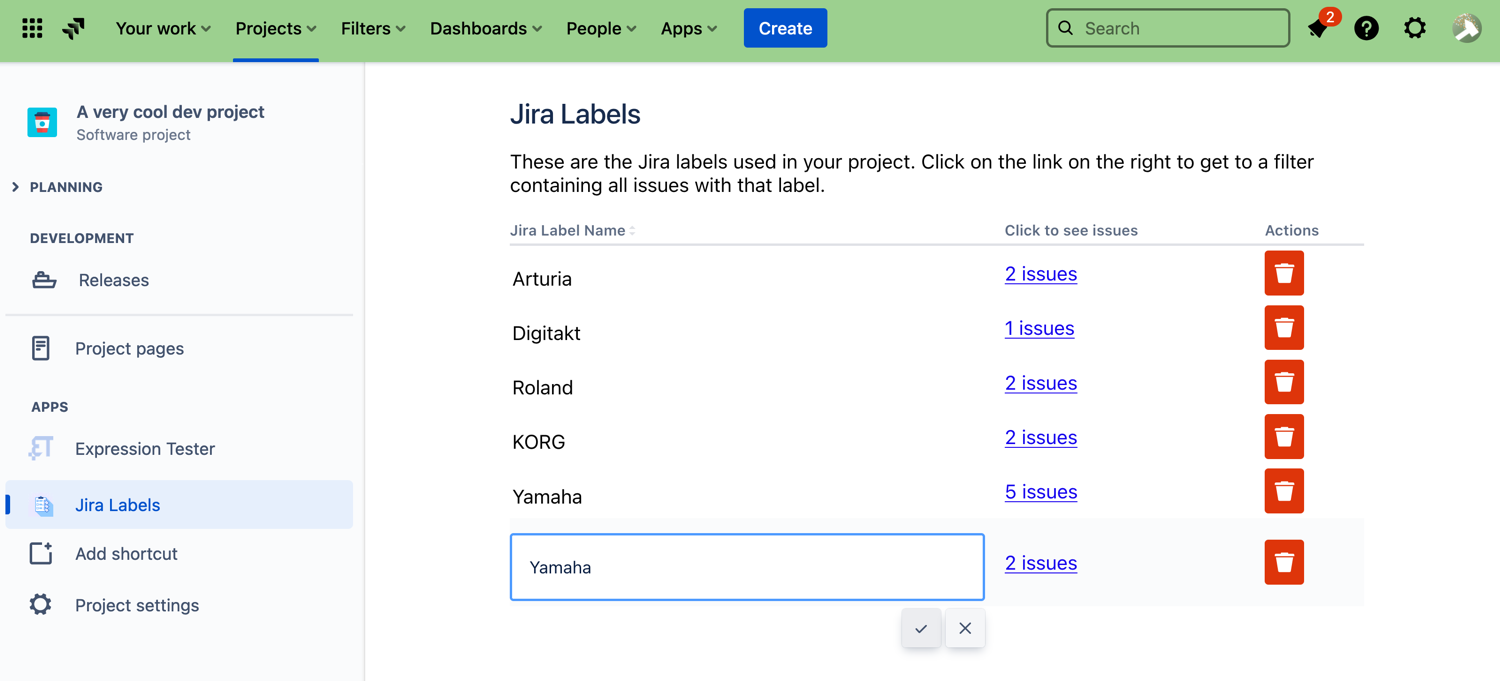
Sometimes, you will need to merge two labels. Typically, this happens when you notice different spellings for what should be the same label, like in the screenshot below:

Dealing with this situation is really easy with Project Labels: Simply rename the unwanted spellings to the spelling you would like to keep.
Deleting a Jira Label
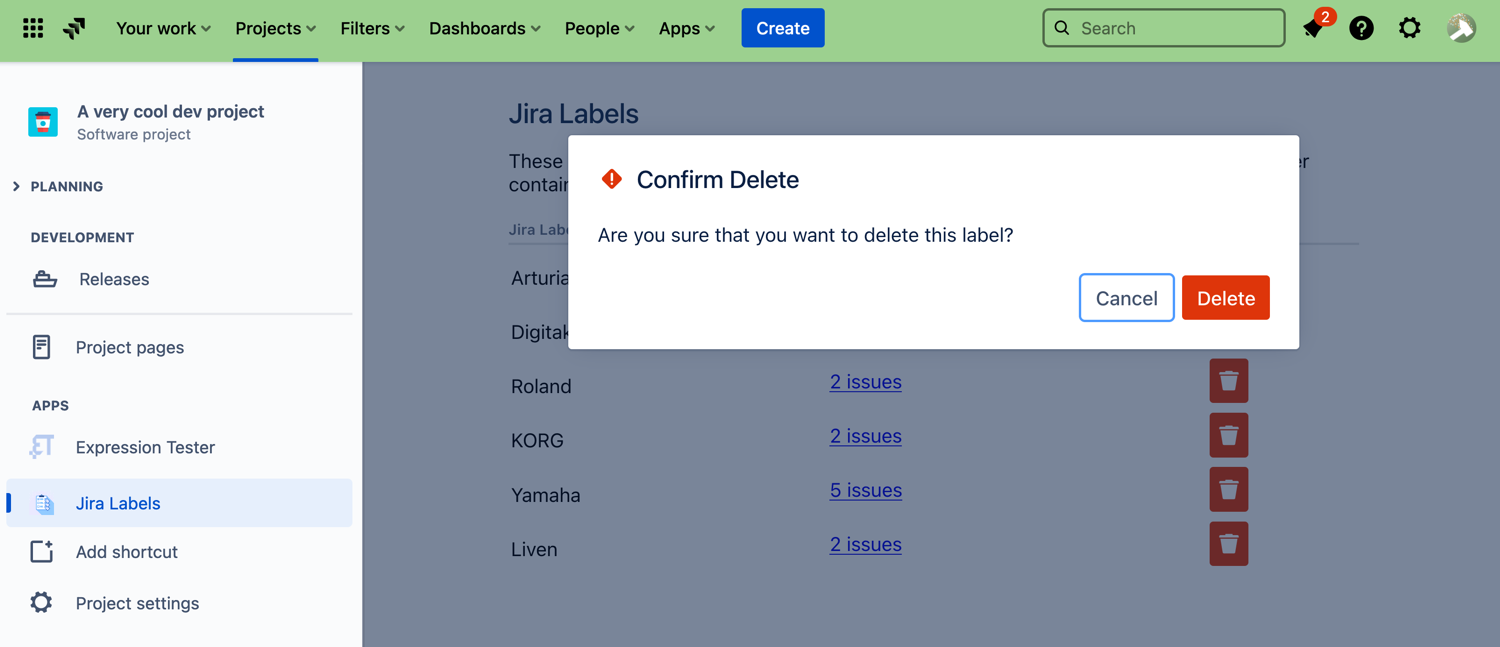
Deleting a label is just as easy as you would expect. Simply click the trashcan icon next to the label you want to delete. You will then be asked to confirm that you want the label deleted:

Click Delete to remove the label from all issues in your current project.
Once a label has been deleted, it will no longer be suggested when adding a label unless it is also in use in another project.